3 Get started with quarto
In this chapter, we are going to present briefly what is quarto.
Quarto is an open-source publishing system, it was created by a core team at Posit.
In the following parts of the book, we will always create a quarto document to capture our R code to run the ETL or to perform some data visualizations.
4 What is quarto ?
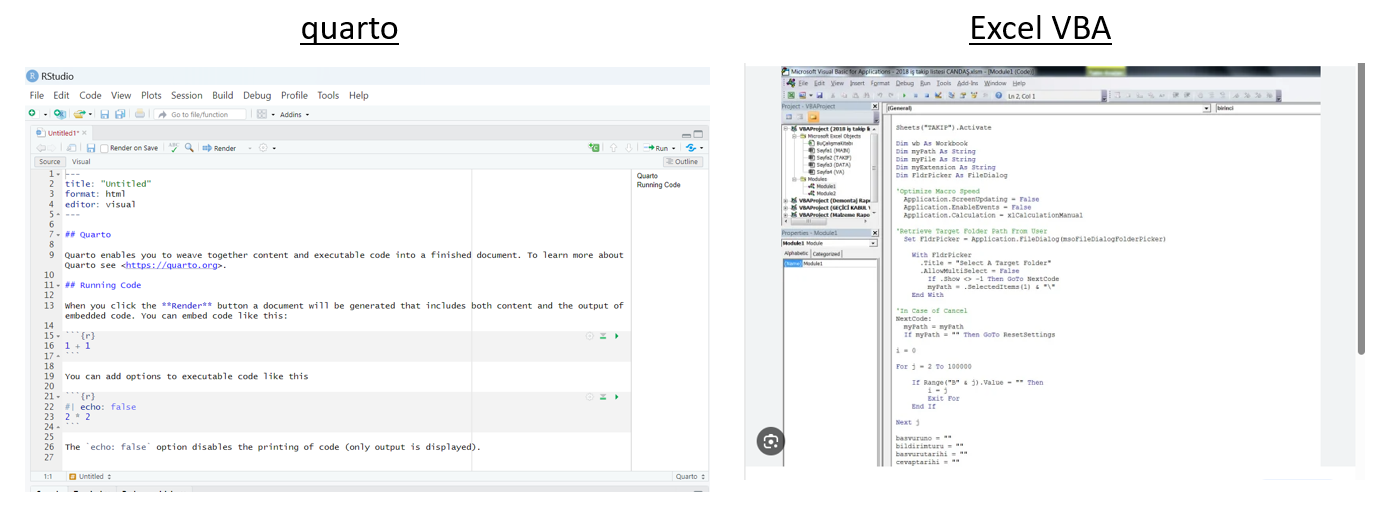
We can compare a Quarto document to an excel VBA macro.
It’s also :
easier to create, maintain & run.
and is much more beautiful & powerful too.
A quarto document contains lines of codes, and comments, to transform data and visualize them.
It also organizes the story, to transform and analyze data.
Note :
before quarto was created, we used to code in a ery similar document called Rmarkdown
it’s then very likely that you will find some people using both. They work roughly the same way. Quarto documents being more modern than the Rmarkdown documents.
We will use quarto documents to :
write some notes (to explain why we are doing something)
- it’s always very useful to write notes, for others, and also for your future self, who might want to understand in a few weeks (or even the next day!) the methodology applied.
organize and execute some codes
display some results : from a simple data frame to more elaborated tables and charts
create static dashboards and web apps
- we will see later on that it’s possible to run the library
shinyinto a quarto document, to generate a web app
- we will see later on that it’s possible to run the library
There’s more
We can do much more with quarto!
Quarto is perfect to share with others what you are doing. You can create :
a website
presentations
some articles, through html pages
a book
…
Here is an example of website created using quarto : planr
To learn more about quarto, let’s visit the website: https://quarto.org/
5 How to use quarto
5.1 Overview quarto document
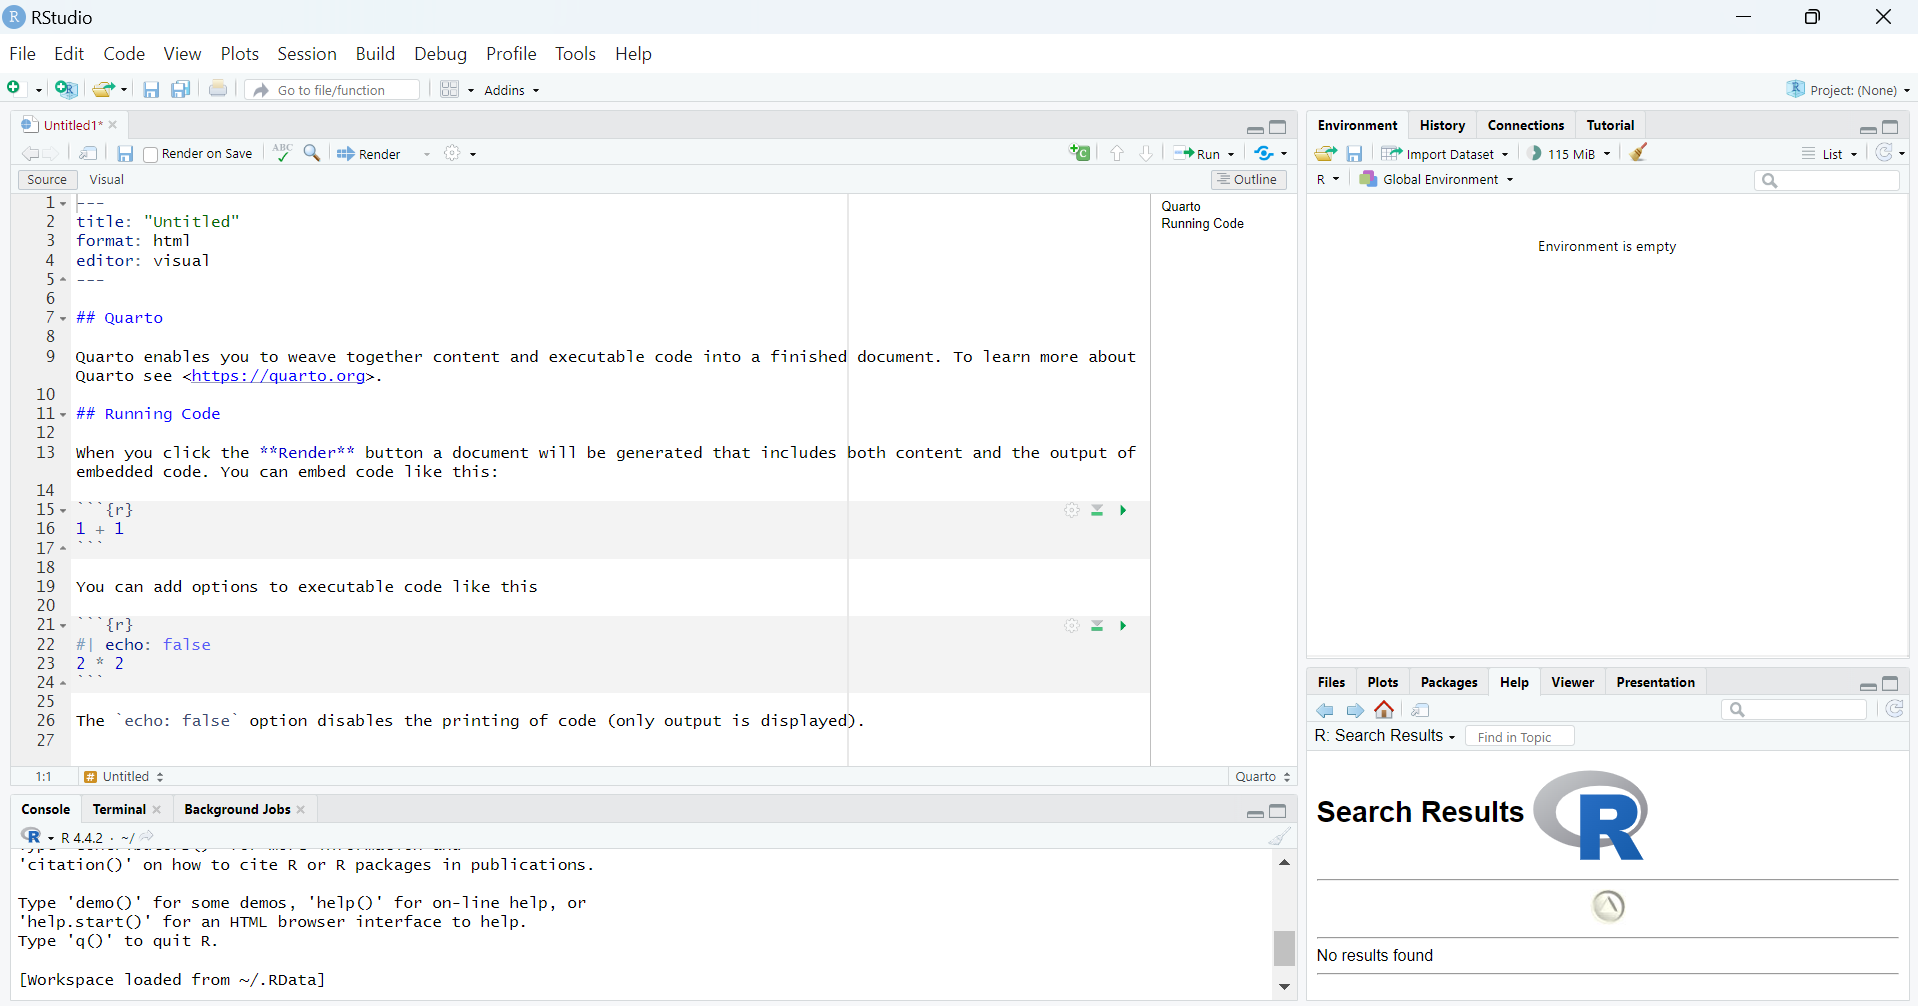
When we create a quarto document, we arrive on a by default template as below.
We can notice :
a big part on the top left : YAML header
- YAML (a recursive acronym for “YAML Ain’t Markup Language”) is a human-readable data-serialization language.
- “It is commonly used for configuration files and in applications where data is being stored or transmitted.” (Wikipedia)
- basically, it contains as key information :
- a title
- an author
- a date
- and some info about the type of output (pdf, html,…)
some titles or subtitles
with different indexes : # or ## or ###
those indexes will organize a Table Of Contents (TOC) later on, through different levels.
level 1 : #
level 2 : ##
level 3 : ###
some text written into white parts
- to provide some info, for ex. : explanations about the workflow to analyze the data, the story, comments behind the analysis, etc…
- note : as mentioned earlier, it’s (very) useful to put as many comments as we can; by doing so, it will be easier to understand our document when someone else reads it, or your “future self” a few months later
some code written in gray part : chunks
includes:
the language (R, Python, Julia,…)
the name of the chunk
some attributes to display, execute or not the whole code
5.2 Chunks and Comments
We write our code inside a chunk.
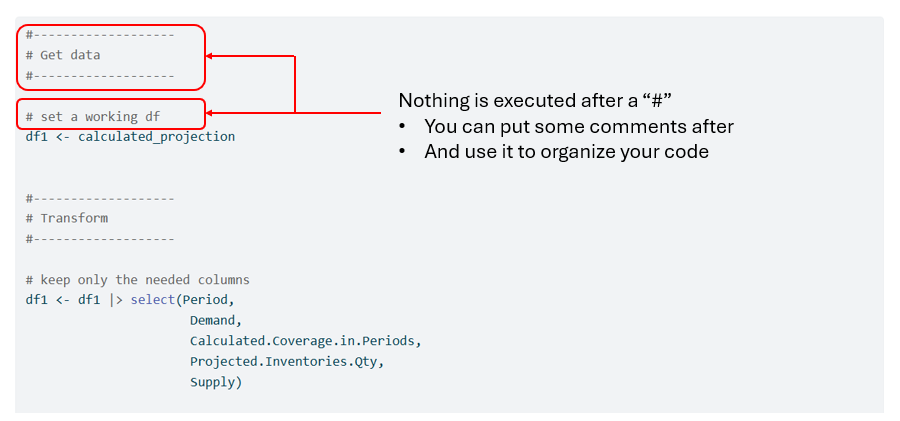
If we want to write some comments inside a chunk we can type a hashtag “#” and then write some notes.
the instruction written after a “#” is not executed.
it’s also a good way to test some lines of code: you can inactivate some and run the other ones.
5.3 Table of Content
5.3.1 Outline button
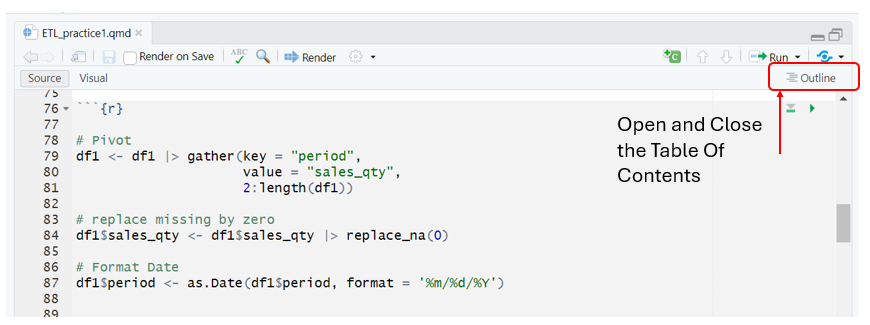
Click on the “Outline” button of your quarto document (located at the top right).
a Table Of Contents (TOC) appears.
the different levels are organized based on the indexes.
A Table Of Contents allows us to navigate easily through the different parts of the code.
Just click on the part you want to look at, and it will bring you there.
5.3.2 Display on html page
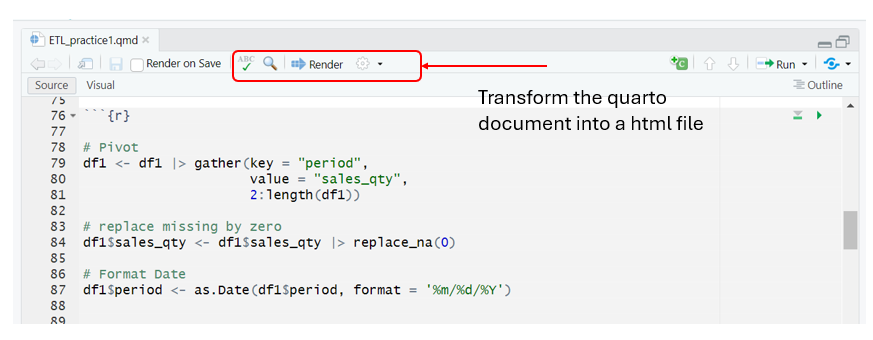
When you click on the “Render” button you can transform your quarto document into another format, for example a pdf or a html page.
the by default format is a html page.
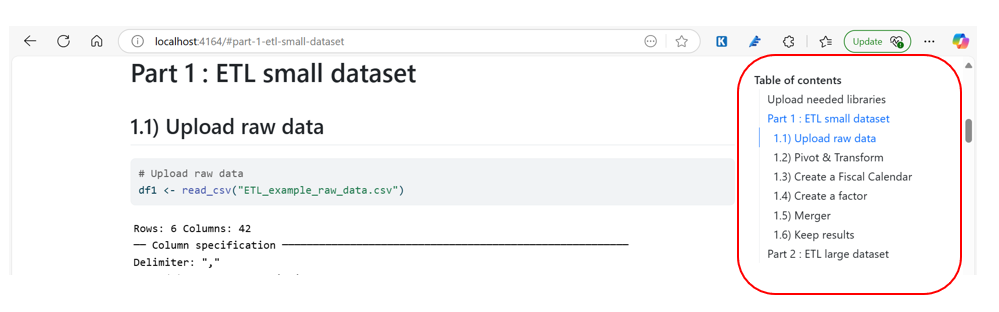
we can see that the Table Of Contents appears on the right.
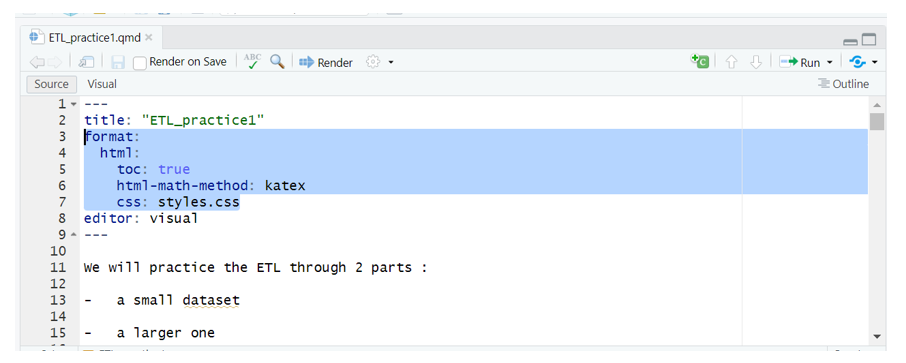
Note : to display the Table Of Contents when you render the html page, you need to modify the yaml, adding the elements below :
Now the table of contents can appear on the right side of the quarto document, once displayed as a html page :
6 Running a code
6.1 Some specific lines
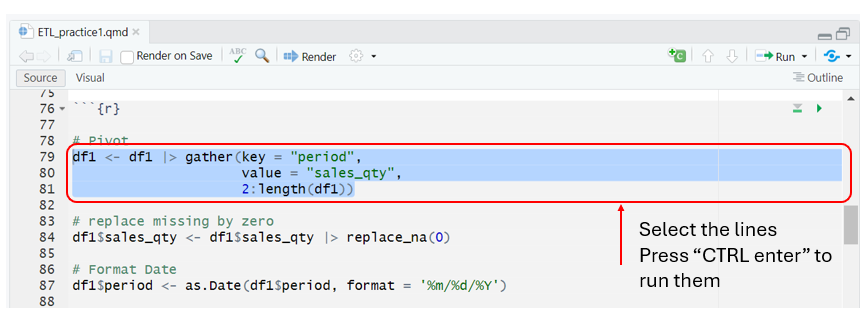
If you want to run some specific lines of codes, you just need to select them and press “CTRL + enter”.
You can see that the lines are then executed inside the console.
6.2 A chunk
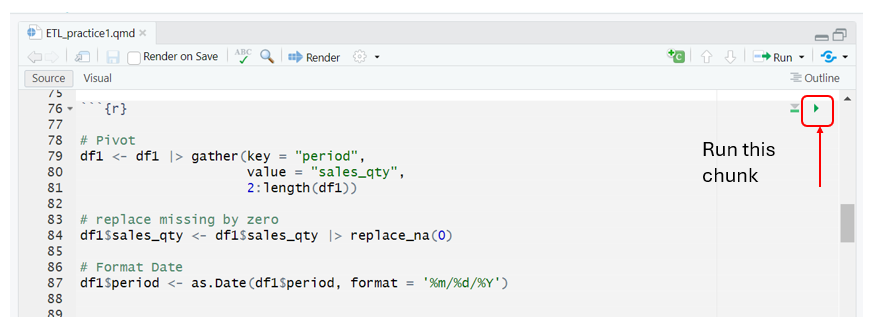
You can run all the code contains within one chunk. For this, you just need to click on the button below :
6.3 All chunks above | below
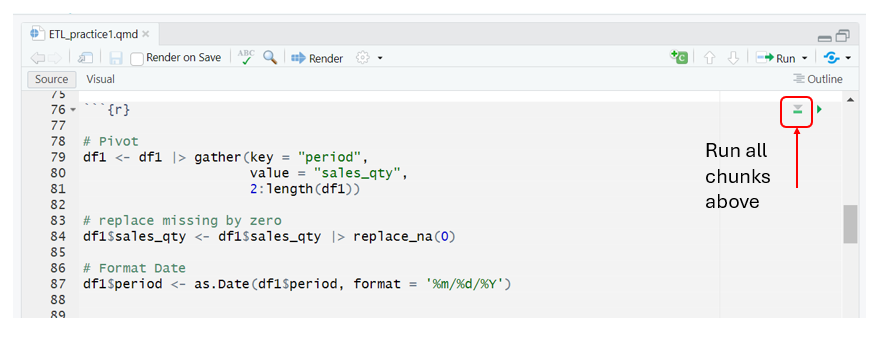
You can also decide to run all the previous or next lines of code. So no need to run each chunk one by one, you simply can click on the button “Run All Chunks Above” or “Run All Chunks Below” .
Perfect, so now we’re ready to start practicing!
Let’s start with the next section : the ETL (Extract Transform Load) part.